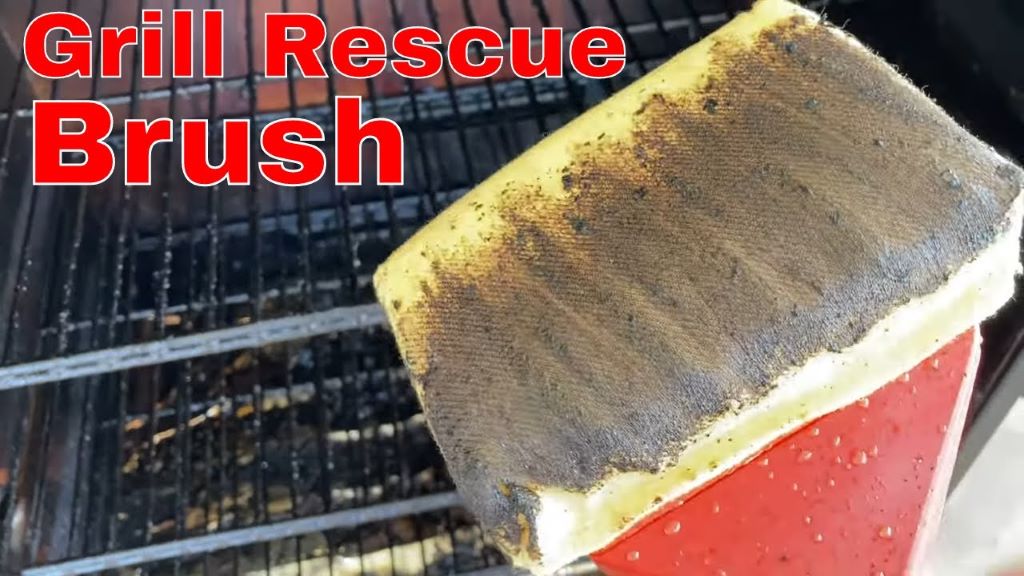
17 Feb How to Clean Grill Rescue Brush?
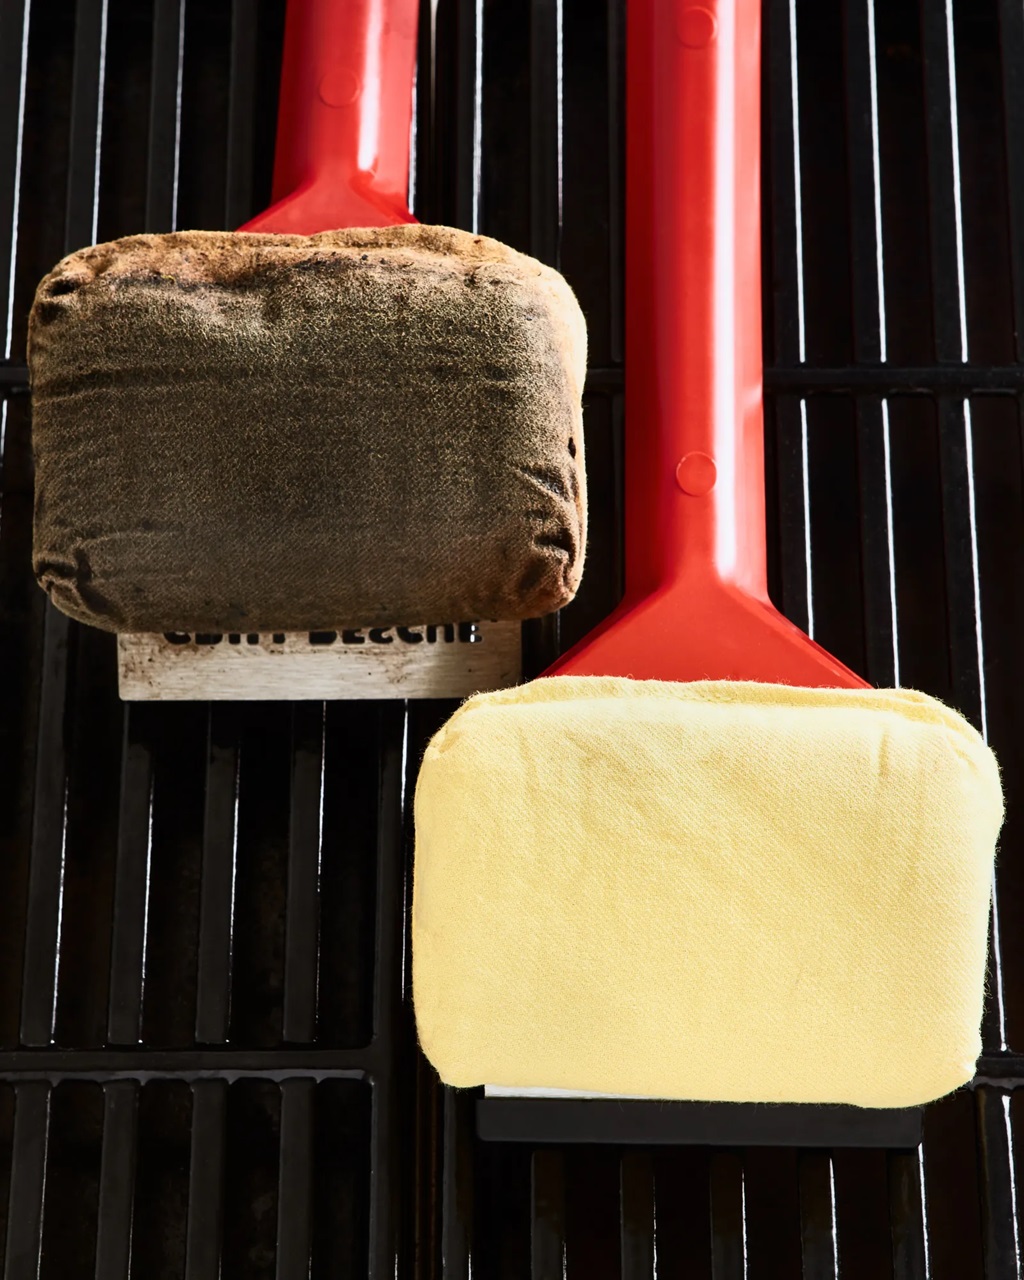
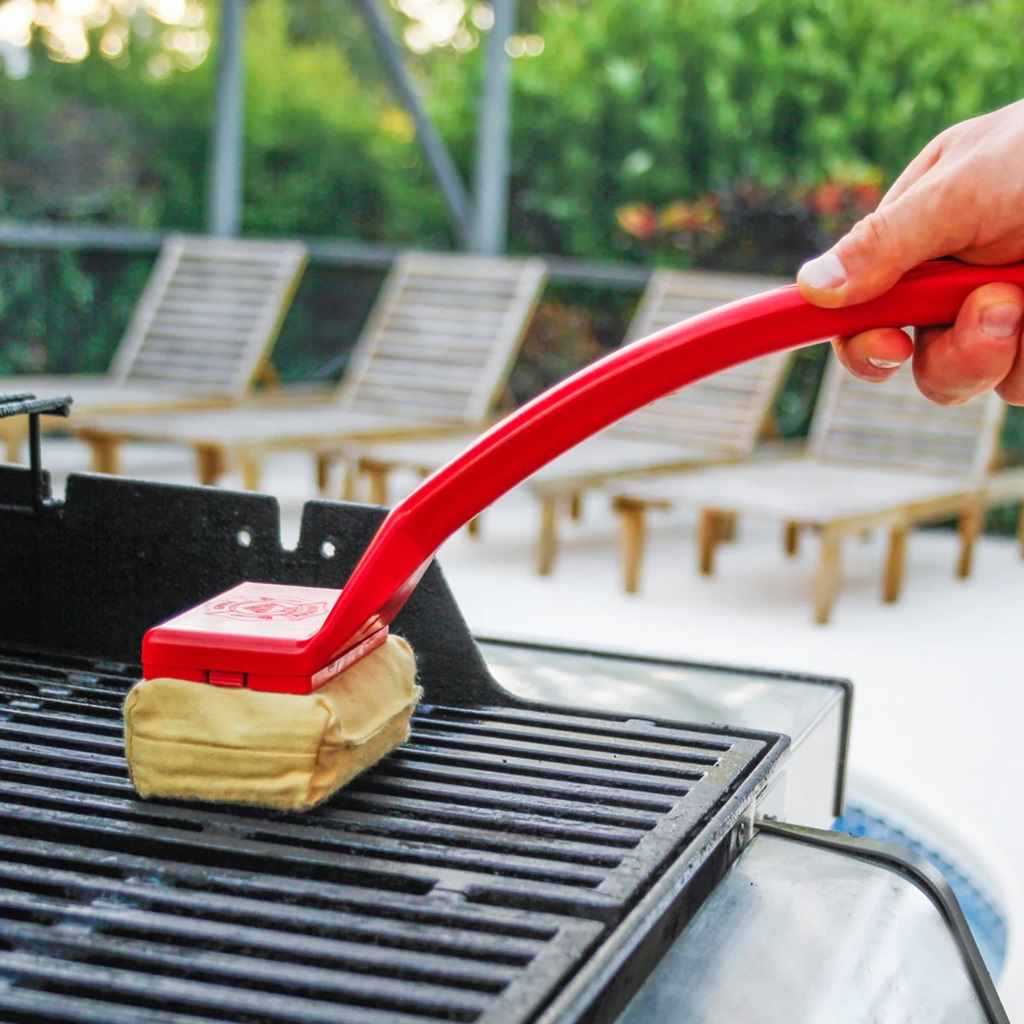
A grill brush is one of the most important yet often overlooked tools in a griller’s arsenal. This rugged scrubbing brush serves a crucial purpose – conquering the charred, sticky mess left behind on grill grates after searing juicy steaks, sizzling veggies, and charring freshly caught fish. Let’s look at how to clean the grill rescue brush.
Without a grill brush on hand, you’re left fruitlessly scraping at the grate with wads of foil or paper towels, desperately trying to remove the blackened grease and stuck bits of food. Even worse, neglecting to clean the grate at all leaves a chaotic jumble of flavors and potential bacteria lurking to get on your next meal. That’s why it’s so important to keep your grill brush sparkling clean!
Why You Should Clean Your Grill Brush
There are a few key reasons why giving your grill brush a good scrub now and then is a good idea:
Remove Leftover Food and Grease
Each time you use your grill brush, some food particles and grease will get stuck in the bristles. If you don’t clean the brush, these scraps can accumulate and get Messier each time you brush the grates. This can lead to uncontrolled flaking and contamination of your food.
Prevent Cross-Contamination
Bits of raw meat and contaminants can collect on a dirty grill brush over time. Then the next time you use it, those particles can get onto the cooking surface or your food. Thoroughly cleaning the grill brush removes this health risk.
Extend the Life of the Brush
Like any frequently used tool, grime build-up can take its toll on the integrity of the grill brush bristles and handle. Getting rid of debris helps the brush last longer before needing replacement.
Improve Functionality
When debris gets lodged in the bristles, it makes the brush less effective at scrubbing the grill grates clean. A quick cleaning restores the brush’s scrubbing power.
Make Future Cleaning Easier
It’s much easier to remove fresh grease and food particles than caked-on grime that’s had time to harden. Regular cleaning prevents the buildup of stubborn gunk.
Ensure Flavor Transfer Doesn’t Occur
If you use the same dirty grill brush on foods with distinct flavors, like fish vs. red meat, residues can transfer between foods and alter the taste. Cleaning helps avoid this cross-flavor contamination.
For Appearance
A grubby-looking brush detracts from your otherwise pristine grill. Restoring it to its former shine keeps your barbecue equipment looking its best.
So proper grill brush hygiene comes with many benefits! The next sections will cover how to clean different types of grill brushes.
Cleaning Metal Wire Grill Brushes
Stainless steel wire grill brushes are a popular choice thanks to their durability and scraping power. But all those nooks and crannies between the wires are prime real estate for grime to hide. Here is how to clean metal wire grill brushes properly:
Routine Cleaning After Each Use
- While the grill is still warm, brush the grate surfaces vigorously to dislodge any stuck bits. Use a plastic scraper if needed to chip off stubborn cooked-on debris.
- Hold the brush over the grate and run through the grill’s high heat zone for 30 seconds. This will burn off most grease and food particles caught in the wires.
- Use a grill cleaning block or mild abrasive pad to scrub the dirty grill brush bristles while still hot. This helps remove debris without damaging wires.
- Rub a little vegetable oil on the bristles once cool. This prevents any moisture left from grilling from causing corrosion.
- Store with the brush head hanging or standing bristles up until the next BBQ session. Don’t nestle bristles against the brush body.
- After each grilling session, inspect wires for stray broken bits. Poke out and discard any you find to prevent metal fragment contamination.
Deep Cleaning
In addition to light cleaning after each use, the grill brush needs a more thorough scrubbing occasionally. Follow this deep cleaning routine about once a month during the grilling season:
- Make a bowl of hot, soapy water. Use a degreasing dish soap. Allow the grill brush to soak the bristles down for 15 minutes.
- Scrub brush against a textured grill cleaning block immersed in soapy water. Target areas with visible debris.
- Use a small wire barbecue brush to dislodge gunk between the larger wires.
- Rinse under hot water while scrubbing the brush against the cleaning block.
- Optional: For really dirty grill brushes, extend soaking time to 1 hour. Or simmer bristles in a saucepan of hot soapy water for 15 minutes to loosen baked-on grease and bits.
- Spray bristles with white vinegar and let sit 5 minutes. Rinse. The vinegar’s acidity helps remove grime.
- Dry thoroughly with a clean towel. Let air dry completely before the next use.
Deep Cleaning with Electrolysis
For a deep clean that removes stuck-on gunk at a microscopic level, consider electrolysis cleaning.
You’ll need:
- 5-gallon plastic bucket or large plastic tub
- 1/4 cup baking soda
- 1/4 cup salt
- Water
- Battery charger or solar charger capable of 12+ volts
Mix baking soda, salt, and water until dissolved. Submerge the grill brush fully in the solution.
Attach the positive lead from the battery charger/solar charger to the metal grill brush. Clip the negative lead to a piece of sacrificial scrap steel, such as rebar, placed in the bath.
Turn on the power supply and let run for 45-90 minutes. Small bubbles will form on the metal. The electrolysis process removes all dirt and oxidation.
When done, rinse and dry the grill brush. It will look almost new!
Cleaning Nylon Bristle Grill Brushes
Nylon bristle grill brushes offer an alternative to traditional wire types. The flexible synthetic bristles are better at conforming to the grate’s curves and won’t scratch porcelain enamel. Clean nylon brushes a bit differently than metal ones:
Routine Cleaning
- After preheating and oiling the grill grates, scrub with a nylon brush to clean surfaces and warm brush bristles.
- Avoid burning off food bits by holding over high heat, as this can melt nylon bristles.
- While the grill is still warm, use the brush to dislodge debris on cooking surfaces. For stuck bits, let the grate cool slightly and use a plastic scraper.
- Clean brush bristles using hot soapy water and a grill cleaning block. Rinse and dry thoroughly.
- Don’t oil nylon bristles after use like you would metal grill brush wires. The oil can cause the bristles to retain more dirt.
- Store standing up or hanging to allow air circulation around the bristles.
Deep Cleaning
Give nylon bristle grill brushes a deep clean 1-2 times per month:
- Soak bristles in hot, soapy water for 15-30 minutes. Use a degreaser.
- Scrub against a textured grill cleaning block underwater to dislodge all debris.
- Rinse under hot water while scrubbing.
- Optional: For really dirty brushes, simmer the head in hot soapy water for 10 minutes to loosen the grime.
- Spray bristles with diluted white vinegar and let sit briefly before rinsing.
- Dry thoroughly with a clean towel. Let air dry completely before storing or reusing.
Cleaning Stainless Steel Grill Brushes
Stainless steel grill brushes have tightly packed bristles made from thin strips of stainless steel. The dense bristles effectively scrape food residue off grill grates. Clean as follows:
Routine Cleaning
- While the grill is still hot after cooking, give the grates a vigorous scrubbing with the stainless brush.
- Hold the brush over the grill’s high heat zone for 30 seconds. This burns any grease and debris out of the tight bristles.
- Use a grill cleaning block and hot soapy water to scrub the remaining dirt off the stainless bristles.
- Rinse clean. Dry thoroughly with a towel.
- Let air dry completely before storing. Stainless steel can corrode if put away damp.
- Check for any broken bristles and discard. Damaged thin stainless strands can adhere to food.
Deep Cleaning
Every 1-2 months, do a more thorough cleaning:
- Soak the stainless steel brush head in hot soapy water for 30 minutes. Use a degreasing dish detergent.
- Scrub vigorously with a textured grill cleaning block underwater to loosen all gunk.
- Rinse under hot water while scrubbing.
- Spray bristles with vinegar and let sit briefly before rinsing away.
- Make sure to dry completely with a clean towel before storing. Let air dry as well.
Cleaning Wood Handle Grill Brushes
Wood handles lend a handsome, natural look to grill brushes. But their porous structure can soak up grease, food particles, smoke odors, and germs over time. Here is how to clean them:
Routine Cleaning
- Soapy water to remove any grease or debris on the surface. Avoid submerging the whole handle in water.
- For extra disinfection, wipe down the wood with a sanitizing kitchen spray containing bleach or alcohol. Let the sanitizer sit briefly before wiping dry.
- Rub a little food-grade mineral oil into the wood handle to keep it conditioned and prevent drying out from the cleaning chemicals.
- Let the handle fully air dry before storing the grill brush. Moisture can warp or crack wood.
Deep Cleaning
- Monthly, clean the wood handle more thoroughly by taking these extra steps:
- Lightly scrub with a non-abrasive sponge or rag dipped in hot, soapy water. Target any stained or dirty areas.
- Rinse clean under running water, being careful not to soak the entire handle.
- Spray or wipe generously with a disinfecting solution such as diluted bleach water. Let sit 5 minutes.
- Rinse away disinfectant and immediately dry the wood with a clean towel.
- Apply a fresh coat of food-grade mineral oil to the clean handle to seal and protect the wood.
Proper care keeps your wood-handled grill brush looking great!
Cleaning Plastic Handle Grill Brushes
Plastic handles offer a durable, weather-resistant option for grill brushes. Clean plastic as follows:
Routine Cleaning
- After each grilling session, wipe the plastic handle with a soapy rag to remove grease and residue.
- Use a small brush or cotton swab dipped in soapy water to scrub crevices.
- Spray with disinfectant and wipe clean. Isopropyl alcohol works well.
- Rinse briefly under water if needed but avoid soaking the handle.
- Dry thoroughly with a clean towel before storing.
Deep Cleaning
- Every 1-2 months, do a deeper cleaning:
- Soak just the plastic handle in hot, soapy water for 15 minutes to loosen the grime. Avoid the brush head.
- Scrub with a non-abrasive sponge or nylon brush.
- Rinse clean under hot water.
- Disinfect by spraying the handle heavily with isopropyl alcohol or another sanitizing solution. Wipe clean.
- Dry thoroughly before returning the grill brush to storage or using it again.
This keeps plastic looking clean and helps remove odors.
Cleaning Bamboo Grill Brushes
Bamboo makes a naturally bacteria-resistant option for eco-friendly grill brushes. But the handles still need occasional cleaning:
Routine Cleaning
- After each use, wipe the bamboo handle with hot, soapy water and rinse briefly to remove surface dirt.
- Spray the handle lightly with disinfectant and wipe clean. White vinegar works well.
- Allow the bamboo handle to completely air dry before storing the brush.
Deep Cleaning
- Monthly, deep clean the bamboo handle this way:
- Mix a solution of 1 part hydrogen peroxide, 1 part water, and 1 tsp white vinegar.
- Dip a clean rag into the solution. Gently scrub the bamboo handle to remove stains or grime.
- Rinse clean with water. Dry thoroughly with a towel.
- Rub a little food-grade mineral oil into the bamboo to condition it.
- Let dry fully before using or putting the grill brush away.
This keeps bamboo looking its best while removing odors and germs.
Storing Grill Brushes Properly
To keep your grill brush clean for as long as possible between uses, store it correctly:
- Let the brush dry fully before putting it away, so moisture doesn’t attract dirt.
- Hang brushes or store them standing upright. Don’t nestle the bristles horizontally against the handle.
- Store in a clean, dry spot away from sources of grease splatter.
- Consider dedicating a storage hook inside your grill cabinet just for brushes.
- Replace grill brushes once a year or when bristles appear frayed, bent, or broken.
Proper storage habits prevent recontamination of your freshly cleaned grill brush!
When to Replace Grill Brushes
While you can extend the life of grill brushes with good cleaning and storage methods, they do wear out over time. Here are signs it’s time to replace your grill brush:
- Bristles appear frayed, melted, bent, broken, or shedding. Damaged bristles can’t be cleaned effectively or may stick to food.
- The handle is cracked, split, moldy, smells bad, or otherwise deteriorating. This makes the brush harder to grip and unhygienic.
- Brush no longer seems to remove grime from grill grates well, even after cleaning. Bristles have worn down too far.
- It’s been over 1 year since you purchased the grill brush. Bristles wear down with repeated use.
- You used a wire brush on a porcelain enamel coating and left scratches. Don’t risk further damage.
- After cleaning, you notice rust or corrosion on the brush wires. Time for a fresh start.
Retiring an aging grill brush ensures top performance from each grilling session. It’s a small price for clean food.
Grilling and Food Safety Tips
Proper use and cleaning of your grill tools is just one part of cooking safely. Keep these other tips in mind:
- Always wash hands, prep tools, platters, and cookware before and after handling raw meat.
- Don’t reuse platters or utensils that touch raw meat before fully washing. This avoids cross-contamination.
- Use a meat thermometer to ensure meats cook to a safe internal temperature. Ground beef should reach 160°F and chicken 165°F.
- When basting meat, don’t reuse a brush or mop that touches raw meat unless you first boil the tool.
- Refrigerate all leftovers promptly. Discard any food left sitting out for longer than 2 hours (1 hour if over 90°F outside).
Paying attention to hygiene and food safety ensures healthy, delicious grilling results!
Frequently Asked Questions
1. Can I put my grill brush in the dishwasher to clean it?
It’s best to avoid this. The high heat and harsh detergent can degrade grill brush bristles and handles over time, shortening the lifespan. Hand washing is recommended.
2. What’s the best way to clean stuck-on burnt food gunk from my grill brush?
For really stubborn debris, try soaking just the brush head in hot, soapy water for an extended period, or simmering the bristles in hot soapy water for 10-15 minutes. This loosens burnt residue so you can scrub it away more easily.
3. How do I get rid of greasy build-up on my grill brush handle?
Use hot, soapy water and a degreasing dish detergent to dissolve grease on grill brush handles. Scrub with a non-abrasive sponge. Disinfecting sprays like diluted bleach solution also help eliminate grease and odors.
4. Can I use a wire grill brush on my porcelain enamel grill?
It’s best not to. The wire bristles can scratch the porcelain over time. Use a nylon bristle or stainless steel brush instead to safely clean the delicate enamel surface.
5. What’s the best way to fully dry a grill brush after cleaning it?
Let the brush air dry as much as possible first. Then thoroughly dry all surfaces with a clean lint-free towel before storing or reusing. Dampness can corrode metal wires or warp wood handles over time.
Conclusion
Like any frequently used kitchen equipment, grill brushes inevitably get grimy with grease, charred food, and smoke residue. But don’t neglect this essential grilling tool. Keeping your grill brush clean improves flavor, extends usefulness, and prevents cross-contamination during cooking.
Match your cleaning method to the grill brush type for best results. Discovering the best ways to maintain outdoor kitchen cabinets ensures your grilling tools are stored in perfect condition, and spending a few minutes scrubbing and disinfecting the brush periodically makes your next barbecue quicker and more appetizing. Combining grill brush hygiene with smart food safety practices results in healthy, mouthwatering backyard cuisine all grilling season long.
Sorry, the comment form is closed at this time.