28 May How to Install Spray Paint Bathroom Cabinets
Spray painting bathroom cabinets can be a cost-effective and creative way to update the look of your bathroom. Whether you want to breathe new life into old cabinets or transform their appearance to match your bathroom’s aesthetic, spray painting can offer a fresh and stylish solution. This article will guide you through installing spray paint bathroom cabinets, ensuring a successful and professional-looking outcome.
Bathroom cabinets play a crucial role in both functionality and aesthetics. Over time, they may show signs of wear and tear, or their color might no longer align with your design preferences. Instead of investing in new cabinets, spray painting can be an excellent alternative that saves you money while allowing you to personalize the cabinets according to your taste.
Why Spray Paint Bathroom Cabinets?

Image source: Google.com
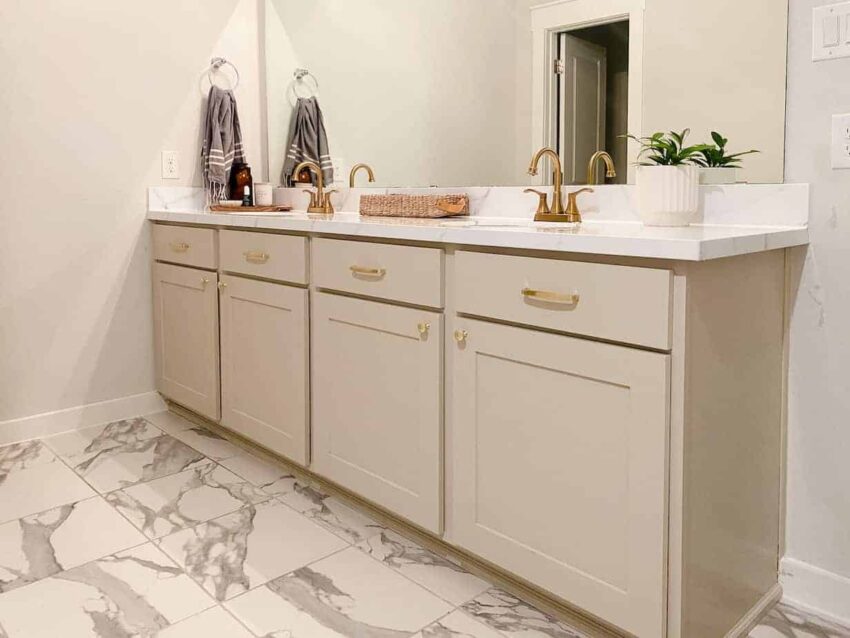
Spray painting offers several advantages when it comes to updating bathroom cabinets. Firstly, it provides a smooth and even finish, free from brush marks. Additionally, spray paint allows for quicker application, ensuring you can complete the project efficiently. Moreover, the vast range of colors and finishes available in spray paints allows you to achieve a customized look that perfectly matches your bathroom’s style.
However, it’s important to note that while spray painting can offer numerous benefits, it’s essential to consider the specific material of your bathroom cabinets. For instance, if your cabinets are made of cork, it’s worth exploring the cork spray pros and cons. Cork spray paint is a specialized product that coats and protects cork surfaces. It can provide a seamless and uniform finish while maintaining the cork’s natural texture and feel. Some advantages of cork spray paint include enhanced durability, moisture resistance, and easy maintenance. However, it’s important to be aware of any potential drawbacks or limitations associated with cork spray paint, such as limited color options or the need for careful application techniques.
Preparing the Cabinets
Before diving into the spray painting process, proper preparation is crucial to ensure optimal results and longevity of the paint job.
Cleaning the Cabinets
Start by thoroughly cleaning the cabinets to remove dust, dirt, or grease. Use a mild detergent and warm water solution to wipe down the surfaces. Pay special attention to areas that come into contact with oils and products, such as handles and knobs.
Sanding the Cabinets
After cleaning, lightly sand the cabinet surfaces to create a better adhesion surface for the primer and paint. Use fine-grit sandpaper or a sanding block to smooth out any imperfections or rough areas. Remember to wipe away the sanding dust before moving forward.
Protecting the Surrounding Area
It’s essential to take precautions to avoid accidental overspray and protect the surrounding area.
Covering the Floor and Countertops
Cover the bathroom floor and countertops with plastic sheets or drop cloths to prevent paint splatters and spills. Secure the coverings with masking tape to keep them in place during the painting process.
Removing Hardware
Remove any handles, knobs, or other hardware from the cabinets. This will allow for a cleaner and more even application of the paint. Place the hardware in labeled plastic bags to ensure they don’t get misplaced.
Applying Primer
Priming the cabinets is a crucial step that helps the paint adhere better and provides a smooth base for the color coats.
Choosing the Right Primer
Select a primer specifically designed for the material of your cabinets, such as wood or laminate. Consider using a bonding primer to paint over a glossy or previously painted surface. Consult with your local paint store or follow the manufacturer’s instructions to choose the appropriate primer.
Applying Primer to the Cabinets
Apply the primer to the cabinets using a high-quality brush or a paint sprayer for a smoother finish. Ensure even coverage on all surfaces, including the cabinets’ fronts, sides, and edges. Allow the primer to dry completely before proceeding.
Spray Painting the Cabinets
Now that the cabinets are properly prepped and primed, it’s time to apply the spray paint.
Selecting the Paint
Choose a high-quality spray paint specifically formulated for cabinets. Consider the color, finish, and durability of the paint. Opt for a satin or semi-gloss finish for bathroom cabinets, as they are easier to clean and more moisture-resistant.
Using the Spray Paint
Hold the spray paint can approximately 6-8 inches away from the cabinet surfaces. Apply the paint in a steady, sweeping motion, moving from side to side. Ensure to overlap each pass slightly to achieve an even coat. Start with thin coats and gradually build the layers to prevent drips or runs.
Applying Thin Coats
It’s better to apply multiple thin coats rather than one thick coat. This approach allows the paint to dry faster and minimizes sagging or uneven drying risk. Follow the drying time recommended by the paint manufacturer between each coat.
Drying and Curing
After completing the spray painting process, it’s essential to allow sufficient time for the paint to dry and cure.
Allowing the Cabinets to Dry
After the final coat of paint, let the cabinets dry in a well-ventilated area. Follow the paint manufacturer’s instructions for the recommended drying time. Avoid touching or using the cabinets until the paint has completely dried.
Curing the Paint
Curing time is required for the paint to reach its maximum hardness and durability. While the paint may feel dry to the touch, it might still be vulnerable during the curing phase. Follow the paint manufacturer’s guidelines for curing time before reattaching hardware and using the cabinets normally.
Reinstalling Hardware and Cleaning Up
Once the cabinets are fully dry and cured, you can reattach the hardware and refresh your bathroom.
Reattaching Hardware
Carefully reinstall the handles, knobs, or other hardware you removed earlier. Take your time to ensure they are securely fastened. Consider updating the hardware to give the cabinets an entirely new look.
Cleaning Up the Area
Remove the protective coverings from the floor and countertops. Dispose of any used masking tape, plastic sheets, or drop cloths. Give the bathroom a thorough cleaning to remove any residual dust or debris from the spray painting process.
Spray painting bathroom cabinets is an effective and budget-friendly way to transform the look of your bathroom. By following the step-by-step process outlined in this article, you can achieve professional-looking results and enjoy cabinets personalized to your style and preferences.
You may like to read Fixing Whirlpool Dishwasher Leaking from the Bottom of Door


Sorry, the comment form is closed at this time.