26 Apr DIY Car Air Freshener: A Step-by-Step Guide
Driving a car can be a delightful experience, especially when the car smells fresh and clean. However, maintaining that fresh smell can be quite challenging. Commercial air fresheners are often expensive, filled with harsh chemicals, and only last for a few days. The good news is that you can make your own car air fresheners with natural ingredients that are safe, effective, and easy to make. In this article, we will provide you with a step-by-step guide on how to make your own DIY car air freshener. The content is presented by Newhouseproject.
Materials Needed
Image source: Google.com
Before we begin, let’s gather the materials for making the air freshener. The following are the materials required:
- Small glass jars with lids
- Baking soda
- Essential oils (any scent of your choice)
- Scissors
- Cardstock paper
- Glue
- Hole puncher
- Ribbon or twine
Step-by-Step Guide
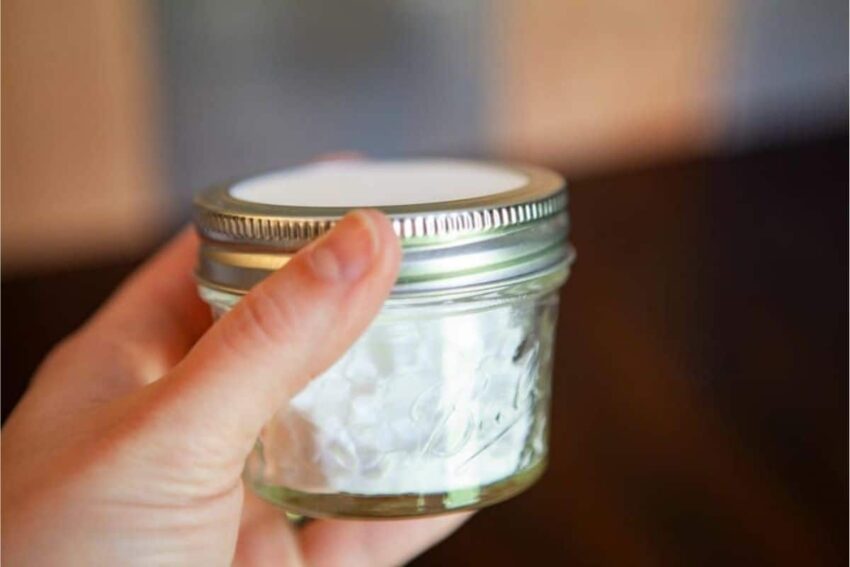
Step 1: Prepare the Jar
The first step is to prepare the jar. Take the small glass jar and fill it up with baking soda. Baking soda helps to absorb any odors in the car. See also: Transform Your Room: A Guide to Installing Crown Molding
Step 2: Add Essential Oil
The next step is to add essential oil to the baking soda. Add a few drops of essential oil to the baking soda and mix it well. Essential oils come in various scents, so choose one that appeals to you. Lavender, peppermint, lemon, and eucalyptus are some of the popular scents used in making car air fresheners.
Step 3: Make the Air Freshener Topper
Now, let’s make the air freshener topper. Cut out a circle shape from the cardstock paper that fits the size of the jar lid. Punch a hole in the center of the circle using the hole puncher.
Step 4: Add Ribbon
Tie a ribbon or twine through the hole in the center of the topper. The ribbon will help to hang the air freshener from the rearview mirror.
Step 5: Glue the Topper
Glue the topper to the top of the jar lid. The topper adds a decorative touch to the air freshener and makes it look more appealing.
Step 6: Wait
Allow the essential oils to infuse with the baking soda for a few hours. The longer you wait, the stronger the scent will be.
Step 7: Place the Air Freshener in the Car
Once the essential oils have been infused with the baking soda, place the air freshener in the car. Hang it from the rearview mirror or place it in a cup holder.
Step 8: Reuse or Replace
The air freshener will last for a few weeks. Once the scent starts to fade, you can reuse the jar by adding more essential oil or replace the baking soda with a fresh batch.
Benefits of DIY Car Air Fresheners
There are many benefits to making your own DIY car air fresheners. Firstly, you get to choose the scent that you like. Secondly, you are using natural ingredients that are safe for you and your family. Thirdly, it is cost-effective as you can make multiple air fresheners with the same materials. Lastly, it is environmentally friendly as you are not using any harsh chemicals that are harmful to the environment.
Precautions
Although making your own car air freshener is safe and easy, it is important to take some precautions. Do not place the air freshener in direct sunlight or in a hot car as it may cause the glass jar to break. Keep the air freshener out of reach of children and pets. If you have any allergies, check with your doctor before using essential oils. Also, do not use too much essential oil as it may cause a headache or irritation.
In conclusion, making your own DIY car air freshener is an easy, safe, and cost-effective way to keep your car smelling fresh and clean. By following the step-by-step guide outlined in this article, you can make your own natural air freshener that is both effective and environmentally friendly. So, try making your own car air freshener today and enjoy the benefits of a fresh-smelling car!
Sorry, the comment form is closed at this time.